Matthew Thorne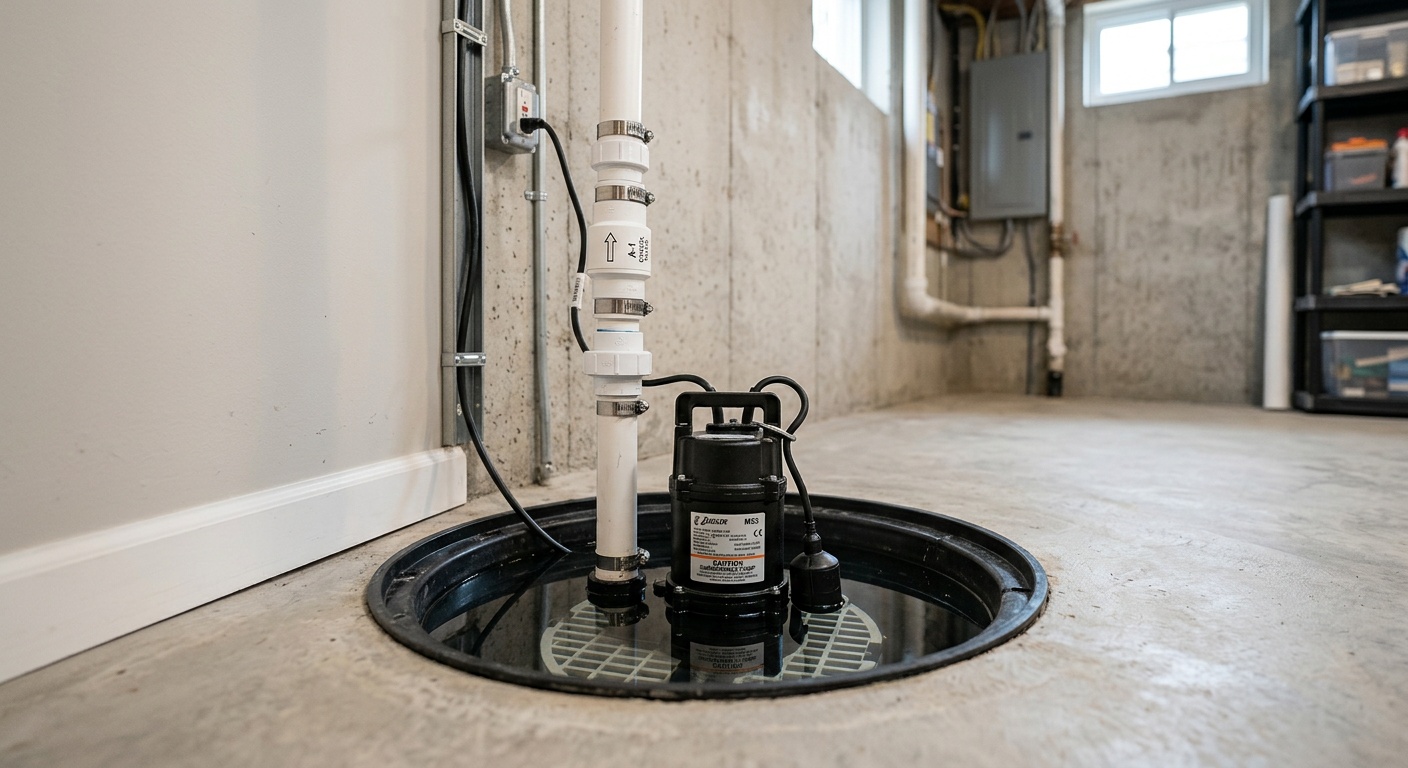
Basement Waterproofing Basics Every New Homeowner Should Understand
Reading time: 14 minutes
You just got the keys to your new home. Congratulations. Now, someone at the housewarming party leans over and says, “Did the inspector mention anything about the basement?” And just like that, a tiny seed of worry takes root.
Here’s the straight talk: basement water problems are among the most common — and most expensive — issues homeowners face in 2026. According to the National Association of Home Builders, approximately 60% of homes in the United States experience some form of basement moisture or water intrusion during their lifetime. Yet most new homeowners have no idea what they’re looking at when they walk into their lower level.
This guide isn’t about scaring you. It’s about equipping you with the knowledge to recognize problems early, understand your options, and make smart financial decisions before a small damp patch becomes a $30,000 disaster.
Table of Contents
- Why Basement Waterproofing Matters More Than Ever in 2026
- How Water Actually Gets Into Your Basement
- Warning Signs You Should Never Ignore
- The Core Waterproofing Methods Explained
- Interior vs. Exterior Waterproofing: A Real Comparison
- What Does Basement Waterproofing Cost in 2026?
- DIY vs. Professional: Knowing the Difference
- Frequently Asked Questions
- Your Dry Basement Action Plan: Next Steps
Why Basement Waterproofing Matters More Than Ever in 2026
The conversation around basement waterproofing has shifted significantly. In 2026, extreme weather events — heavier rainfall, faster snowmelt cycles, and rising groundwater levels in many regions — are no longer rare occurrences. They’re seasonal expectations. The Federal Emergency Management Agency (FEMA) reported in 2025 that flood-related property damage claims increased by 22% compared to the previous five-year average, with basement flooding accounting for a disproportionate share of residential claims.
Beyond weather, there’s a powerful financial motivation. A properly waterproofed basement can add 10–25% to your home’s resale value, according to data compiled by HomeAdvisor in 2025. Conversely, visible water damage or musty odors can kill a real estate deal faster than almost any other defect. In today’s market — where buyers are increasingly inspection-savvy — a wet basement is a red flag that drains negotiating power.
There’s also a health dimension that often gets overlooked. Moisture in basements creates ideal conditions for mold growth, which can begin forming in as little as 24 to 48 hours after water exposure. The EPA estimates that indoor mold affects air quality throughout the entire home, not just the basement level, potentially triggering respiratory issues, allergies, and long-term health complications for your family.
“Waterproofing a basement isn’t a luxury upgrade — it’s foundational home maintenance. Neglecting it is like refusing to change the oil in your car and being surprised when the engine fails.” — Mark Jennings, Certified Structural Waterproofing Specialist, speaking at the 2025 Home Performance Summit
How Water Actually Gets Into Your Basement
Before you can solve a problem, you need to understand its mechanics. Water doesn’t magically appear in basements — it follows specific, predictable pathways. Knowing these pathways helps you identify vulnerabilities in your own home.
The Three Primary Entry Routes
1. Hydrostatic Pressure
This is the most powerful and least visible force at work. When water saturates the soil surrounding your foundation, it exerts hydrostatic pressure — essentially pushing against your basement walls and floor from the outside. Over time, this pressure forces water through even microscopic cracks in concrete or block foundations. Homes built in areas with high clay content soil, which retains water rather than draining it, are especially vulnerable. Clay soils can expand up to 20% in volume when wet, compounding the pressure on foundation walls.
2. Surface Water Infiltration
This is the most preventable entry route. When the ground around your home’s foundation slopes toward the house rather than away from it, rainwater naturally flows directly to your foundation and pools there. The same problem occurs when gutters overflow or downspouts deposit water too close to the foundation. The fix can be as simple as regrading the soil or extending a downspout — but only if you catch it early.
3. Condensation and Interior Humidity
Not all basement moisture comes from outside. In warm, humid months, warm moist air entering a cool basement can condense on cold walls and floors, creating puddles and wet patches that look exactly like a leak. This “sweating” phenomenon confuses many new homeowners who assume they have a serious waterproofing problem when the actual fix might be as simple as a dehumidifier or improved ventilation.
The Crack Classification System
Professional waterproofers classify foundation cracks by type and orientation, because not all cracks are equally threatening:
- Hairline cracks (under 1/16 inch): Often cosmetic, caused by normal concrete curing. Monitor them but don’t panic.
- Horizontal cracks: Serious red flag. These indicate lateral soil pressure and can signal structural compromise. Requires immediate professional evaluation.
- Vertical cracks: Common from foundation settling. Can allow water entry but are generally not structural emergencies.
- Stair-step cracks (in block foundations): Indicate differential settling. Severity depends on width and displacement.
- Diagonal cracks running from corners: Often caused by differential settlement. Monitor width changes over time.
Pro Tip: Mark the ends of any crack with pencil and date it. If it grows, you have documented evidence of active movement — crucial information for a contractor or insurance claim.
Warning Signs You Should Never Ignore
Consider this a practical scenario: you move into your new home in early spring. By June, you notice a faint musty smell in the basement. You assume it’s just “old house smell” and place an air freshener near the stairs. By August, you see white powdery deposits on the walls. By October, there’s visible mold on the drywall in the corner. What started as a $500 crack injection job is now a $12,000 mold remediation and waterproofing project.
This scenario plays out thousands of times every year. Here are the warning signs that demand your attention:
- Efflorescence: That white, chalky, crystalline powder on basement walls is mineral salt left behind when water evaporates through concrete. It’s essentially your wall’s way of telling you water has been passing through it.
- Musty or earthy odors: Mold and mildew have a distinctive smell. If your basement consistently smells like a wet forest floor, you have moisture accumulation.
- Peeling paint or bubbling drywall: Moisture beneath the surface causes finishes to fail. This is especially telling on concrete block walls painted with waterproofing paint.
- Rust stains: Orange or brown streaks running from metal components indicate prolonged water exposure.
- Visible mold growth: Dark spots (black, green, gray) on walls, floors, or joists need immediate professional attention. Don’t attempt to clean large mold colonies yourself.
- Damp or wet carpet or flooring: If basement carpet feels spongy or wet after rain, water is coming in from below or through walls.
- Bowing or bulging walls: A structural emergency. Call a professional the same day.
The Core Waterproofing Methods Explained
Waterproofing isn’t a single solution — it’s a spectrum of strategies, each suited to different problems, budgets, and foundation types. Understanding the core methods helps you have an informed conversation with contractors and avoid being oversold on solutions you don’t need.
Interior Waterproofing Systems
Interior waterproofing doesn’t stop water from entering — it manages water once it’s inside the wall system and directs it away from your living space. The two key components are:
Interior Drainage Systems (French Drains): A perforated pipe is installed around the perimeter of the basement floor, beneath a gravel bed, and connected to a sump pump. Water that seeps through the walls or up through the floor is captured and redirected. This is currently the most popular and cost-effective solution for ongoing water management in existing homes.
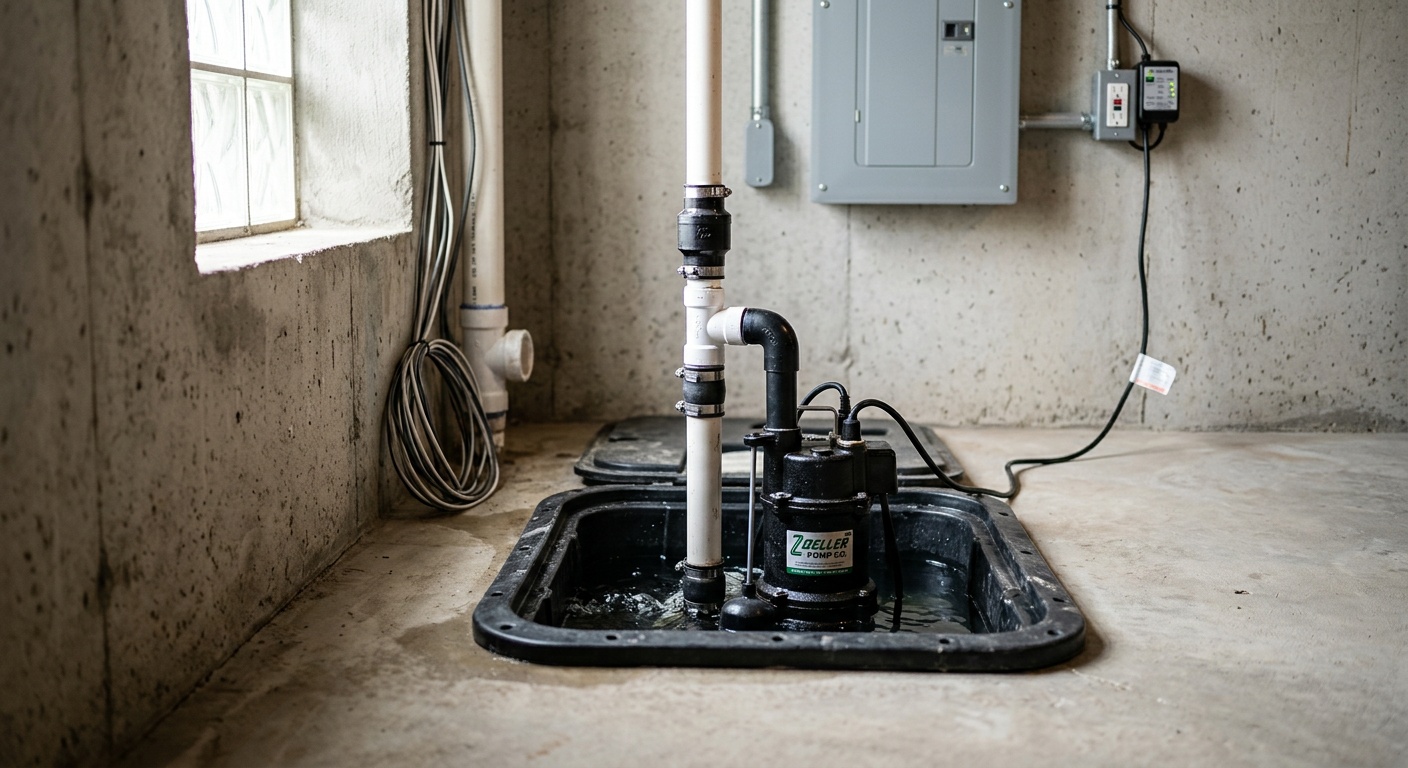
Sump Pump Systems: The sump pump is the heart of any interior drainage system. It sits in a pit (sump basin) at the lowest point of the basement and automatically pumps collected water away from the foundation. In 2026, battery-backup sump pump systems have become the standard recommendation, given increasing grid reliability concerns during storm events. A battery backup ensures your pump keeps working precisely when you need it most — during a power outage caused by the same storm filling your basement.
Exterior Waterproofing Systems
Exterior waterproofing addresses the problem at its source — the outside of your foundation wall. It’s more invasive and expensive but considered the gold standard for permanent waterproofing:
Excavation and Membrane Application: The soil around the entire perimeter of the home is excavated down to the footing. The foundation wall is cleaned, and a waterproof membrane (either sheet-applied or spray-applied) is applied directly to the exterior surface. A drainage board is then placed against the membrane, and the soil is backfilled. This creates a true physical barrier against water penetration.
Exterior French Drains: Similar to interior systems but installed outside the foundation, these capture and redirect groundwater before it contacts the foundation wall.
Grading and Drainage Improvements: Sometimes the most impactful intervention is the simplest. Regrading the soil so it slopes away from the foundation at a minimum 6-inch drop over 10 feet can dramatically reduce water infiltration. This is always the first recommendation for homes experiencing mild moisture issues.
Interior vs. Exterior Waterproofing: A Real Comparison
One of the most common questions new homeowners ask is: which approach is better? The honest answer: it depends on your specific situation. Here’s a structured comparison to help you think it through.
| Factor | Interior Waterproofing | Exterior Waterproofing |
|---|---|---|
| Average Cost (2026) | $3,000 – $10,000 | $15,000 – $50,000+ |
| Disruption Level | Moderate (interior jackhammering) | High (full excavation, landscaping damage) |
| Effectiveness | Manages water after entry | Prevents water from reaching wall |
| Longevity | 10–20 years (pump maintenance required) | 25+ years with proper membrane |
| Best For | Existing homes, moderate water issues | New construction, severe water problems |
Case Study — The Martinez Family, Columbus, Ohio (2025): When Sarah and David Martinez purchased their 1962 ranch home, the inspector flagged minor efflorescence on the basement walls. Rather than jumping to a $22,000 exterior waterproofing quote from the first contractor they called, they got three opinions. The third contractor recommended a targeted interior drainage system with a dual-pump setup for $6,800. Two years later, through one of the wettest winters Ohio experienced in 2024–2025, their basement stayed completely dry. The lesson: always get multiple opinions, and don’t assume the most expensive solution is automatically the right one.
What Does Basement Waterproofing Cost in 2026?
Let’s talk numbers honestly. Waterproofing costs have risen approximately 8–12% over the past two years, driven by material costs and skilled labor demand. Here’s a realistic breakdown of what you’re looking at in 2026:
Cost Ranges by Solution Type
Basement Waterproofing Cost Comparison (2026 Averages)
$300 – $800
$900 – $2,500
$3,000 – $10,000
$15,000 – $50,000+
$2,000 – $8,000
A critical financial insight: waterproofing is not typically covered by standard homeowner’s insurance because it’s classified as a maintenance issue rather than a sudden, accidental event. However, if water damage results from a covered peril (like a burst pipe rather than seepage), partial coverage may apply. Always review your policy carefully and ask your insurer specifically about water backup coverage — a rider that can be added affordably and covers sump pump failure events.
Smart Budget Strategy: Set aside 1–2% of your home’s purchase price annually for maintenance, and earmark a portion specifically for waterproofing inspection and maintenance. A $400,000 home should have $4,000–$8,000 in annual maintenance reserves. Catching a problem at the $500 crack injection stage is infinitely preferable to the $15,000 remediation stage.
DIY vs. Professional: Knowing the Difference
The internet is full of tutorials about waterproofing your basement yourself, and some of those tutorials are excellent — for certain tasks. The key is understanding exactly where the DIY line ends and professional territory begins.
What You Can Reasonably Do Yourself
- Improving exterior grading: Adding topsoil and regrading soil away from your foundation is a weekend project costing $50–$200 in materials.
- Cleaning and extending downspouts: Ensure downspouts discharge at least 6–10 feet from the foundation. Extensions and splash blocks cost under $50 per downspout.
- Applying hydraulic cement to small cracks: For hairline cracks in poured concrete that aren’t actively leaking, hydraulic cement is a legitimate DIY repair.
- Installing a window well cover: Basement egress windows are common water entry points. Polycarbonate covers that shed rain are simple to install.
- Running a dehumidifier: For condensation issues, a properly sized dehumidifier (rated for the square footage of your basement) can resolve moisture problems entirely.
- Cleaning gutters: Clogged gutters overflow and dump water directly against your foundation. Clean them twice yearly — spring and fall.
When You Absolutely Need a Professional
- Any horizontal crack in a basement wall — this indicates structural compromise
- Active water intrusion (not just dampness, but actual water entering)
- Bowing, bulging, or tilting foundation walls
- Visible mold colonies larger than 10 square feet
- Installation of interior drain tile systems or sump pits (requires concrete cutting)
- Exterior waterproofing membrane application (requires excavation equipment)
- Any concern about foundation integrity whatsoever
Case Study — The Thompson Home, Portland, Oregon (2024): First-time homeowner James Thompson watched a YouTube tutorial and decided to “waterproof” his basement himself using paint-on waterproofing sealer — a $180 investment. The following spring, the hydrostatic pressure behind his foundation wall simply pushed the sealer off in large sheets, revealing the cracks it had temporarily concealed. He then paid a contractor $7,500 for a proper interior drainage system — in addition to the money he’d wasted on the DIY attempt. The lesson: waterproofing paint on a wall with active hydrostatic pressure is like putting a Band-Aid on a broken pipe.
Pro Tip: When hiring a waterproofing contractor, always verify they carry both general liability insurance and worker’s compensation, have verifiable local references, and offer a transferable warranty. A warranty that transfers to future buyers is a genuine selling point when you eventually list your home.
Frequently Asked Questions
How do I know if I have a condensation problem or an actual leak?
Here’s a simple diagnostic trick professionals use: tape a 12-inch square of plastic sheeting (like a piece of garbage bag) directly to the basement wall using duct tape, sealing all four edges. Leave it for 24–48 hours. If moisture appears on the inside of the plastic (between the plastic and the wall), water is coming through the wall from outside — a genuine leak. If moisture appears on the outside of the plastic (on the face you can see), it’s condensation from humid air contacting the cool wall surface — a ventilation or humidity problem. This simple test can save you thousands of dollars in misdiagnosed repairs.
Does basement waterproofing add resale value to my home?
Yes — both directly and indirectly. Directly, a professionally waterproofed basement with a transferable warranty is a documented improvement that buyers value, particularly in regions with high rainfall or high groundwater. Real estate studies from 2025 indicate that resolving basement water issues can recoup 50–70% of project costs in increased resale value, with the remainder recovered in reduced buyer negotiation leverage. Indirectly, a dry basement enables you to finish the space — finished basement square footage is valued at approximately 50–60% of above-grade square footage, representing a significant total value addition. Perhaps most importantly, a documented history of no water problems removes a major inspection red flag that routinely kills deals or forces price reductions.
How often should a basement be inspected for water issues?
At minimum, conduct a thorough self-inspection of your basement twice per year: once in spring after the heavy rain and snowmelt season, and once in fall before winter sets in. During each inspection, walk the entire perimeter checking for new cracks, efflorescence, staining, or damp spots, and test your sump pump by pouring a bucket of water into the pit to confirm it activates properly. Additionally, inspect the exterior grading and gutters as part of these seasonal checks. For homes older than 25 years, or homes that have previously experienced water issues, budget for a professional waterproofing inspection every 3–5 years. Many reputable contractors offer free inspections — but be aware that a “free inspection” from a company that sells waterproofing systems may not be fully objective.
Your Dry Basement Action Plan: Next Steps
You’ve covered a lot of ground in this guide. Now let’s turn that knowledge into a concrete, prioritized action plan. Waterproofing a basement isn’t about doing everything at once — it’s about addressing problems in the right order with the right urgency.
Here’s your 5-step immediate implementation checklist:
- Inspect this weekend (Day 1): Walk your basement perimeter with a flashlight and a notepad. Document every crack (sketch its location, measure its width), check for efflorescence, smell for mold, and examine every wall-floor joint. Do the tape-plastic test on any suspicious wall areas. Then walk the exterior — check grading, gutter condition, and downspout discharge locations.
- Fix the free stuff first (Week 1–2): Extend downspouts if they’re too close to the foundation. Clean gutters if they’re clogged. Add topsoil to grade soil away from the foundation if it’s sloping inward. Install window well covers over any basement windows. These zero-to-low cost interventions eliminate surface water infiltration problems entirely in many homes.
- Test and service your sump pump (Week 2): Pour water in the pit and confirm activation. Check the discharge line to ensure water is being expelled away from the foundation. If your pump is more than 7–10 years old, budget for replacement — a sump pump failure during a storm is exactly the scenario a $200 battery backup system prevents.
- Get professional evaluation if warranted (Month 1): If your inspection revealed active water entry, significant cracks, mold, or structural concerns — get three quotes from licensed, insured contractors. Don’t make a $10,000+ decision based on one opinion. Ensure any contract includes a specific written warranty and ask explicitly whether it’s transferable to future homeowners.
- Build it into your maintenance calendar (Ongoing): Set recurring calendar reminders for semi-annual basement inspections, annual sump pump service, and biannual gutter cleaning. These small, consistent habits are the real foundation of a dry basement over the long term.
The broader context is important here: as climate patterns continue shifting in 2026 and beyond, homes with documented, properly functioning waterproofing systems will increasingly stand apart in real estate markets. Buyers and their inspectors are more sophisticated than ever, and the expectation of a verified dry basement is only growing.
Here’s the question worth sitting with: Which is more valuable to you — saving the cost of a proactive inspection today, or protecting the $400,000+ investment sitting on top of that foundation? For most new homeowners, the math — and the peace of mind — points in one clear direction.
Your basement is the literal foundation of your home investment. Give it the attention it deserves, and it will serve you — and protect your equity — for decades to come.